Introduction: The Importance of Regular Car Maintenance

Maintaining your car is more than just a routine task; it’s a critical aspect of ensuring your vehicle’s safety, performance, and longevity. A well-maintained car is less likely to break down unexpectedly, reducing the risk of accidents caused by mechanical failure. Regular maintenance, such as timely oil changes, tire checks, and brake inspections, keeps your vehicle running smoothly and efficiently, enhancing its overall performance. This not only makes your driving experience more enjoyable but also ensures that your car is ready to handle any road conditions.
In addition to safety and performance, proper car maintenance can significantly extend the life of your vehicle. By keeping all systems in optimal condition, you avoid unnecessary wear and tear, which can lead to expensive repairs down the line. For example, regularly changing your engine oil can prevent engine damage, while maintaining proper tire pressure can improve fuel efficiency and reduce tire wear.
Furthermore, investing in regular maintenance can save you money in the long run. Small issues, if addressed early, can prevent more significant, costlier problems from developing. For instance, replacing a worn-out brake pad is far less expensive than repairing a damaged brake rotor. Over time, these savings add up, making routine maintenance a smart financial decision. To help you keep your car in top condition, consider exploring resources like this comprehensive guide on car maintenance and tips on how to save money through regular upkeep. Taking the time to maintain your car not only ensures a safer and smoother ride but also keeps more money in your pocket.
Check and Change Your Oil Regularly

The Importance of Engine Oil
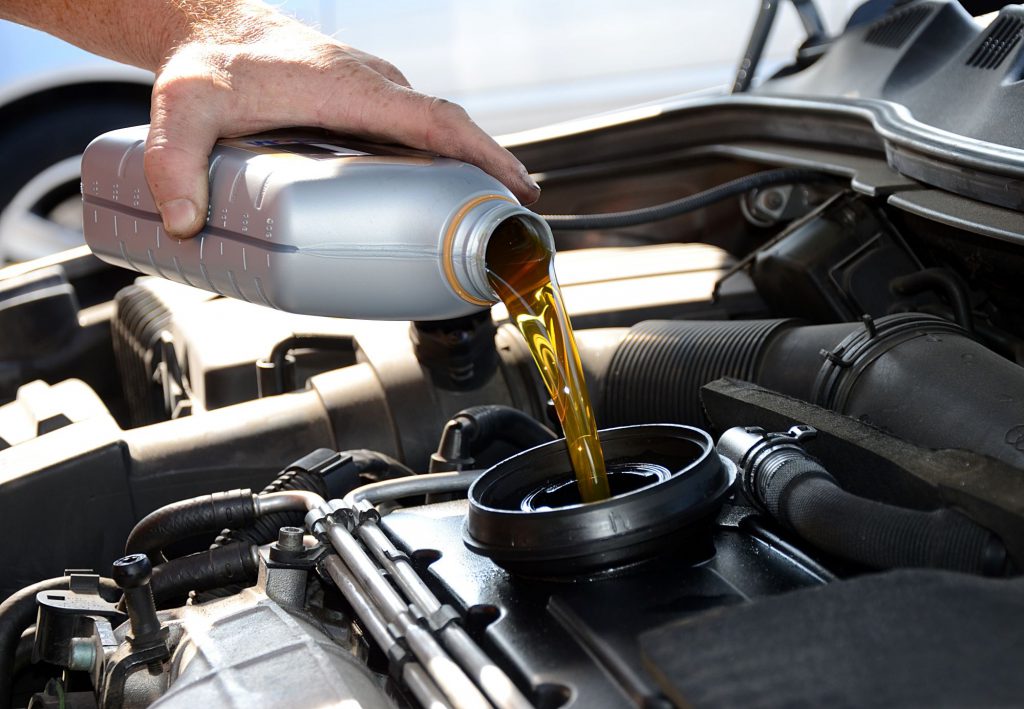
Engine oil is the lifeblood of your car’s engine, playing a crucial role in keeping it running smoothly. It lubricates the engine’s moving parts, reduces friction, and prevents overheating by carrying heat away from the engine. Without adequate and clean oil, your engine can overheat, leading to severe damage and costly repairs. Regularly checking and changing your engine oil is essential to ensure that your engine stays in optimal condition and operates efficiently.
Step-by-Step Guide: How to Check and Change Your Oil
- Prepare Your Vehicle: Park your car on a level surface and turn off the engine. Allow the engine to cool for a few minutes to avoid burns from hot oil.
- Locate the Dipstick: Open the hood and locate the oil dipstick, usually marked with a bright handle. Pull the dipstick out and wipe it clean with a cloth.
- Check the Oil Level: Reinsert the dipstick fully, then pull it out again to check the oil level. The oil should be between the minimum and maximum marks on the dipstick. If it’s low, it’s time for a top-up or oil change.
- Drain the Old Oil: If you need to change the oil, locate the oil drain plug underneath your car. Place a container under the plug, unscrew it, and let the old oil drain out completely.
- Replace the Oil Filter: While the oil is draining, replace the oil filter. Unscrew the old filter and screw in a new one, making sure to apply a little oil to the new filter’s gasket to ensure a good seal.
- Refill with New Oil: Once the old oil has drained, replace the drain plug. Then, refill the engine with the appropriate amount of new oil using a funnel. Be sure to use the oil recommended for your vehicle.
- Check the Oil Level Again: After refilling, check the oil level with the dipstick to ensure it’s within the recommended range. Add more oil if necessary.
- Dispose of Old Oil Properly: Never dispose of used oil in the trash or down the drain. Take it to a recycling center or an auto shop that accepts used oil.
Tips on Choosing the Right Oil for Your Vehicle
Selecting the right oil for your vehicle is crucial for maintaining engine performance. Always consult your car’s owner manual to determine the recommended oil type, which is usually based on the viscosity (e.g., 5W-30, 10W-40). Additionally, consider the climate you live in—synthetic oils may perform better in extreme temperatures. For further guidance, you can explore resources like this guide on choosing the right engine oil and tips on the benefits of different oil types.
By regularly checking and changing your oil, you ensure that your engine remains well-lubricated, runs smoothly, and avoids unnecessary wear and tear.
Keep Your Tires in Top Shape

The Importance of Tire Pressure and Tread Depth
Tires are your car’s only point of contact with the road, making their condition critical for safety and performance. Proper tire pressure ensures that your car handles well, brakes effectively, and provides optimal fuel efficiency. Underinflated tires can cause excessive wear on the tire edges, reducing their lifespan and increasing the risk of a blowout. On the other hand, overinflated tires can lead to a harsh ride and uneven tire wear, particularly in the center of the tread.
Tread depth is equally important, as it affects your car’s ability to grip the road, especially in wet or slippery conditions. Adequate tread depth helps prevent hydroplaning and ensures that your tires can effectively channel water away from the tire surface, maintaining traction. Worn-out tires with shallow tread are not only dangerous but also illegal in many places, so keeping an eye on tread depth is essential.
How to Check and Adjust Tire Pressure
- Gather the Necessary Tools: You’ll need a tire pressure gauge and an air compressor or access to a gas station with an air pump.
- Check the Recommended Pressure: Refer to your car’s owner manual or the tire information sticker inside the driver’s door for the recommended tire pressure, usually measured in PSI (pounds per square inch).
- Check the Tire Pressure: Remove the valve cap from one of the tires and press the tire pressure gauge onto the valve stem. The gauge will display the current tire pressure.
- Adjust the Tire Pressure: If the pressure is too low, add air using an air compressor. If it’s too high, release some air by pressing the center pin in the valve stem with the back of the gauge. Recheck the pressure after adjusting.
- Repeat for All Tires: Ensure that all four tires (and the spare, if applicable) are inflated to the recommended pressure.
- Replace Valve Caps: Once you’ve checked and adjusted the pressure, don’t forget to screw the valve caps back on.
The Benefits of Rotating Your Tires Regularly
Regular tire rotation is a simple yet effective way to extend the life of your tires and ensure even wear. Tire rotation involves changing the position of each tire on your vehicle, typically moving the front tires to the rear and vice versa, sometimes crossing them from left to right. This process helps to distribute the wear more evenly across all four tires, as front tires often wear out faster due to steering and braking forces.
Rotating your tires every 6,000 to 8,000 miles can prevent uneven wear patterns, which can lead to poor handling and reduced traction. Additionally, regularly rotated tires last longer, saving you money in the long run by delaying the need for a new set of tires. For more detailed information on maintaining your tires, including tips on extending their lifespan, check out this tire maintenance guide and learn more about the importance of proper tire care. Keeping your tires in top shape is essential for safe driving and optimal vehicle performance.
Inspect and Replace Your Wiper Blades

Why Clear Visibility is Essential
Clear visibility is a fundamental aspect of safe driving. Your wiper blades play a crucial role in ensuring that you have an unobstructed view of the road, especially during adverse weather conditions like rain, snow, or fog. Without properly functioning wiper blades, your windshield can become smeared, streaked, or even covered in debris, significantly impairing your vision and increasing the likelihood of an accident. Regularly inspecting and replacing your wiper blades ensures that they perform effectively when you need them most, keeping you and others on the road safe.
Signs That Your Wiper Blades Need Replacing
- Streaking or Smearing: If your wipers leave streaks or smears on your windshield, it’s a clear sign that the rubber is worn or damaged.
- Chattering or Squeaking: Wiper blades that make noise or skip across the windshield may have hardened or warped, reducing their ability to clear water effectively.
- Cracks or Splits: Visible cracks, splits, or fraying along the edge of the wiper blade are signs that the rubber has deteriorated and can no longer provide a clean wipe.
- Reduced Contact with Windshield: If parts of the blade aren’t making full contact with the windshield, they won’t be able to clear water properly, leaving areas of your windshield obstructed.
A Quick Guide to Changing Wiper Blades
- Choose the Right Wiper Blades: Refer to your car’s owner manual or use an online tool to find the correct size and type of wiper blades for your vehicle. It’s important to get the right fit to ensure proper functioning.
- Lift the Wiper Arm: Gently lift the wiper arm away from the windshield until it stays in the upright position. Be careful, as the wiper arm is spring-loaded and can snap back if not handled carefully.
- Remove the Old Wiper Blade: Locate the release tab or button on the wiper blade’s attachment mechanism. Press the tab and slide the old wiper blade off the wiper arm. Some wiper blades might require a bit of wiggling to remove.
- Attach the New Wiper Blade: Align the new wiper blade with the wiper arm and slide it into place until you hear a click, indicating that it’s securely attached. Double-check that the blade is firmly connected by giving it a slight tug.
- Lower the Wiper Arm: Carefully lower the wiper arm back onto the windshield, making sure the new blade lies flat against the glass.
- Test the New Wiper Blades: Turn on your car’s windshield wipers to ensure that the new blades are installed correctly and are working smoothly without any noise or streaks.
For more detailed guidance, including video tutorials on how to change wiper blades, you can visit this helpful resource and learn more about choosing the best wiper blades for your vehicle. Regularly replacing your wiper blades is a simple yet vital step in maintaining clear visibility and ensuring safe driving conditions year-round.
Test Your Battery’s Health

The Importance of a Fully Functioning Battery
Your car’s battery is the heart of its electrical system, providing the necessary power to start the engine and operate all electrical components, including lights, radio, and climate control. A fully functioning battery ensures that your car starts reliably every time and that all electrical systems operate smoothly. If your battery is weak or failing, you may experience issues such as dimming headlights, slow engine cranking, or even a car that won’t start at all. Regularly testing your battery’s health is essential to avoid these inconveniences and prevent being stranded with a dead battery.
How to Check Battery Voltage and Signs of a Failing Battery
- Gather the Tools: You’ll need a multimeter to check your car battery’s voltage. Ensure the multimeter is set to measure DC voltage.
- Turn Off the Car: Make sure your car is turned off before testing the battery. This prevents any false readings and ensures your safety.
- Locate the Battery: Open the hood and locate your car’s battery. Identify the positive (+) and negative (−) terminals.
- Check the Voltage: Connect the multimeter’s red probe to the positive terminal and the black probe to the negative terminal. A healthy, fully charged battery should read between 12.6 and 12.8 volts. If the reading is below 12.4 volts, your battery may be undercharged. A reading below 12.0 volts indicates a significantly weakened battery that may need replacement.
- Signs of a Failing Battery:
- Slow Engine Crank: If your engine takes longer than usual to start, it could be a sign that your battery is losing its charge.
- Dashboard Warning Light: Many cars have a battery warning light that may illuminate if the battery is weak.
- Swollen Battery Case: If the battery case looks swollen or bloated, it’s a sign of overheating, which can lead to battery failure.
- Corrosion on Terminals: White or blue corrosion around the battery terminals is a sign of acid leakage and can affect the battery’s performance.
Tips on Prolonging Battery Life
- Regularly Drive Your Car: Batteries naturally lose charge when not in use. Driving your car regularly ensures the alternator keeps the battery charged. If you don’t drive often, consider using a battery maintainer to keep it charged.
- Keep the Battery Clean: Dirt and corrosion can reduce battery life by causing electrical resistance. Regularly clean the battery terminals with a mixture of baking soda and water to remove corrosion.
- Check the Battery’s Water Level: If you have a non-sealed battery, check the water level regularly. Add distilled water if the level is low, but avoid overfilling.
- Avoid Short Trips: Frequent short trips can prevent your battery from fully charging. If possible, combine short trips into longer ones to give the battery more time to recharge.
- Turn Off Electrical Components: Before turning off your car, make sure to turn off all lights, radio, and climate control systems to prevent unnecessary battery drain.
- Protect the Battery from Extreme Temperatures: Extreme heat or cold can significantly reduce battery life. If you live in an area with extreme temperatures, consider using a battery blanket or parking in a garage to protect your battery.
Keep Your Brakes in Good Condition
Signs of Brake Wear and When to Replace Them
Your car’s brakes are one of the most critical safety components, and keeping them in good condition is essential for ensuring your vehicle can stop effectively. Over time, brake pads, rotors, and other components wear out and need to be replaced to maintain optimal braking performance. Here are some common signs that indicate it’s time to replace your brakes:
- Squealing or Squeaking Noise: If you hear a high-pitched squeal when applying the brakes, it’s a sign that the brake pads are worn and need to be replaced. Most brake pads have a built-in wear indicator that emits this noise when the pads are nearing the end of their life.
- Grinding Sound: A grinding noise when braking usually means that the brake pads are completely worn down, and the metal backing plate is making contact with the brake rotor. This can cause severe damage to the rotors, so it’s crucial to replace the brake pads immediately.
- Vibrations or Pulsations: If you feel vibrations or pulsations in the brake pedal or steering wheel when braking, it could be a sign of warped rotors. Warped rotors can reduce braking efficiency and should be inspected by a professional.
- Longer Stopping Distances: If your car takes longer to stop than usual, it could indicate that your brake pads are worn out or that there is an issue with the brake system that needs to be addressed.
- Brake Warning Light: Many modern vehicles have a brake warning light on the dashboard that illuminates when there is an issue with the braking system. If this light comes on, it’s essential to have your brakes checked as soon as possible.
Importance of Regular Brake Fluid Checks
Brake fluid is a vital part of your car’s braking system, transferring the force from your brake pedal to the brake pads and rotors. Over time, brake fluid can absorb moisture, which reduces its effectiveness and can lead to brake failure. Regularly checking and maintaining the proper level of brake fluid is essential for safe braking performance.
How to Test Your Brakes at Home
- Perform a Brake Pedal Test: With the car parked and the engine off, press the brake pedal firmly. The pedal should feel firm and not sink to the floor. If the pedal feels spongy or soft, there may be air in the brake lines or a brake fluid leak.
- Conduct a Slow-Speed Brake Test: In a safe, empty area, drive at a low speed and gently apply the brakes. The car should stop smoothly without pulling to one side. If the car pulls to one side, it could indicate uneven brake pad wear or a problem with the brake caliper.
- Check for Unusual Noises: While conducting the slow-speed brake test, listen for any unusual noises such as squealing, grinding, or rattling. These sounds can indicate worn brake components that need attention.
- Test Emergency Braking: At a slightly higher speed (around 20-30 mph), apply the brakes more forcefully to simulate an emergency stop. The car should stop quickly and in a straight line. If the brakes feel weak or if the car veers to one side, it’s a sign that the brakes need servicing.
